Classrooms Overview
- Karen Blatter

- Aug 8, 2023
- 3 min read
Updated: Nov 22, 2023
Managing your classrooms can be hard to do on paper - knowing who can fill open spaces, or who has been on your waiting list shouldn’t have to be guesswork. With our Classrooms feature, you can easily assign a child to a classroom, manage your waitlist, and even see what children can potentially fill spaces in a specific classroom based on their age! While being logged into your account, you can also utilize this help center article for assistance.

The first step to utilizing the benefits of this feature is to get your classrooms added and configured!
To set this up, go to Menu > Settings > Location, then select the Location you would like to set up Classrooms for. Then, scroll down until you see the Classrooms section. Click "+ Add", then select if you would like to Add New Classroom, or Copy Classrooms.

Adding a New Classroom
Once you have selected "Add New Classroom", you will fill out the following information on the form:
Name - Name of the Classroom.
Maximum Occupancy - Maximum number of children allowed.
Minimum Year/Month - Minimum age of the children in years/months.
Maximum Year/Month - Maximum age of the children in years/months.
Staff Ratio - Ratio of how many children to how many staff members.

Once you have filled out the form, click "Save."
Click the down arrow on the new section that has been created to view the classroom parameters you have set.

Note: If you have an integration with Procare or Kangarootime, your classrooms will automatically be synced into IntelliKid Systems upon setup. The age range for the classroom is the only setting that will need to be configured in IKS.
Copying a Classroom
If you selected "Copy Classroom", select a location from the menu, then click "Copy".

The classroom information including all of its parameters will be copied into the location.
Note: You can only copy classrooms from a different location than the one that the classrooms were created in. For example, if you have 3 locations, you can set your guidelines in Location 1, then copy those Classrooms into Locations 2 and 3.
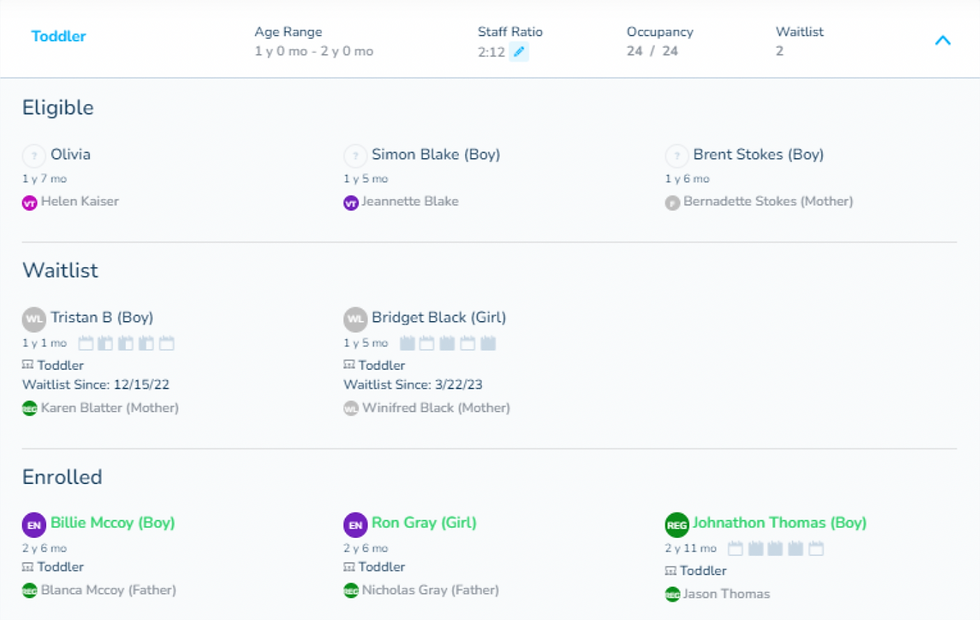
Viewing Classroom Data/Availability
To view the children assigned to a classroom, as well as the Eligible and Waitlist children that can be assigned to the classroom, select Classrooms from the main LMS menu. Click the down arrow of the classroom you would like to view.
Click on the Name of the Child or the Lead to engage with their profile and make updates as necessary.
Assigning a Classroom to a Child
Now that you have your classrooms set up, you can easily assign children to a classroom! First, access the lead’s profile and scroll to the “Children” section on the left-hand side. Click the pencil icon to the right of the child’s name that you would like to assign to a classroom. Once the child’s details have opened, you will see a Classrooms menu has been added!

Select the appropriate classroom, and hit “Save”. The child will now be viewable in that specific classroom.
Our goal with the Classrooms feature is to help you cut back on manual sorting, and to allow the system to make suggestions on who can fill up those available seats with peace of mind. You will know exactly what children are enrolled, what children are eligible for that classroom, and even manage your waiting list - all in one place!
For assistance in implementing Classrooms in your IKS environment, feel free to reach out to one of our knowledgeable Success Engineers.
IKS Academy
Check out this blog post on holding employees accountable in a fun way. It offers creative ideas to keep the work environment enjoyable while ensuring top-notch care for the children.


